Setting Up for the World Geography Homeschool Curriculum
So, I’ve placed my children, had my Heart of Dakota ‘box day,’ and am setting up for high school World Geography (WG). My first step is to read through WG’s Introduction/Overview, Appendix, and first week or month of plans. This helps me envision my year and understand what my guide covers. Each high school credit includes its own specific course description, required resources, course materials, and suggested grading. So, taking time to read through these is time well spent. As I read, I make notes of supplies I need and don’t have on hand in the introduction’s margins. This way, I can easily make my shopping list later based on my notes.
Setting Up the Front of My World Geography Binder
First, I slide the preprinted full color World Geography Expedition Journal cover in the front of my 1 inch 3-ring binder. Second, I print the Overview of the guide off the Internet (click here). I use the Table of Contents as my attendance record, noting the dates we completed each unit (i.e. Unit 1: Sept. 2-6, 2019). Likewise, I include the Earning Credits and Possible Grading Scale in my binder to show how the student earned credit. Third, I print the first week of plans (click here), which is a nice overview. If your state requires a completed portfolio for meeting with a principal or umbrella school, the Introduction and first week of plans give an excellent overview. (Carrie gives permission for the Introduction and First Week of Plans to be printed or copied for portfolio compilation. However, any other photocopies or retyping of plans would be a copyright infringement.)
Label World Geography and Living Library Tab Dividers
Next, I label tab dividers for my WG binder. My goals are to show what my student did to earn his credit and how he progressed in skills. So, I label my first tab “WORLD GEOGRAPHY.” Behind this tab, I place WG’s history notebook pages inside clear page protectors. Throughout the homeschool year, my student takes out each notebook page he is using for the week. Then, when he is done with each page, he simply puts it back in a page protector for safe keeping.
If my student is doing the World Geography Living Library 10% extra credit option (which is an option I personally love for my children to do), I label my second tab “LIVING LIBRARY.” From the WG Appendix, I photocopy about 12-14 two-sided “Summary” pages or about 24-28 single-sided “Summary” pages (I like to have some extra on hand). I 3-hole punch these and put them behind the Living Library tab for my student to take out one at a time to use and put back as each page is completed. I don’t put these in clear page protectors, but you certainly can if you like.
Using Mapping the World with Art
To use Mapping the World with Art, I simply read through its first pages. The Introduction is short and sweet, and the “Tools and Materials You Need” section notes everything I need to have on hand. I usually just make sure I have the drawing tools, types of paper, general supplies, and extra art supplies on hand. As the “Course Materials” section in the WG Introduction notes, I just print pages as scheduled throughout the year from the download of Mapping the World with Art. Finally, I keep completed maps in order in a folder.
Setting Up the Book of Centuries’ Binder
For the Book of Centuries’ portion of the World Geography credit, the WG Introduction suggests using a 1 inch 3-ring binder. The Book of Centuries (BOC) already comes preprinted and 3-hole punched. So, I just slide the preprinted full color BOC Notebook cover in the front of my 1 inch binder. Then, I place the 3-hole punched BOC pages in the binder. As many different BOC pages are used at a time and there is gluing involved, I don’t put these in clear page protectors. Next, following the “Course Materials” section in the WG Introduction, I print the History Through the Ages: World Timeline Figures from the Timeline Figures CD. I put these in a pile in order and staple the top left corner to keep them together. Last, I slide the stapled together timeline pages inside the front of my BOC binder’s pocket.
Setting Up the World Religion and Culture’s Binder
For the World Religion and Culture’s (WRC) course, World Geography’s (WG) Introduction suggests using a 1/2 inch 3-ring binder. The WRC Notebook already comes preprinted and 3-hole punched. So, I just slide the preprinted full color WRC Notebook cover in the front of my 1/2 inch binder. Then, I place each notebook page in a clear page protector. Throughout the homeschool year, my child takes out the notebook page he is using for the week. Then, he simply puts it back in the page protector for safe keeping when he is done.
Per the ‘Course Materials’ section of WRC in the WG Introduction, I also photocopy the two “Bookmark” pages from WG’s Appendix. Then, I follow the directions on Unit 4, Day 4’s WRC’s box of plans in the WG guide to assemble 6-7 bookmarks (I like to have a few extra on hand). I put these in the front or back pocket of the WRC binder. Of course, you can always wait to assemble the bookmarks when they come up in the plans if you’d rather. Either way, as each bookmark is completed throughout the year, I 3-hole punch it and place it in the WRC binder in order after the notebook pages.
Getting Ready for Bible
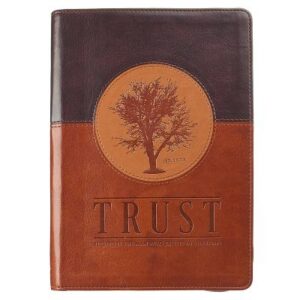
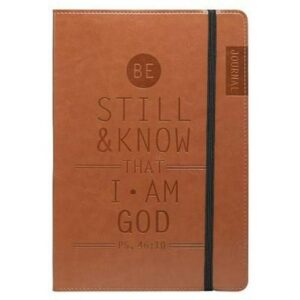
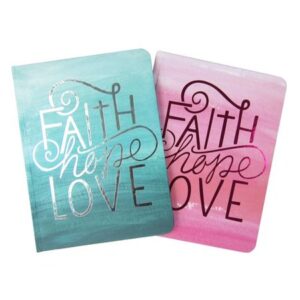
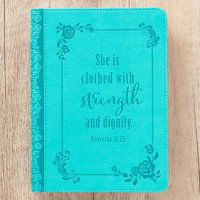
To get ready for Bible, I make one or two photocopies of “Preparing Your Heart for Prayer” from the WG Appendix. Students keep a special prayer journal throughout their Bible course, and the photocopy of “Preparing Your Heart for Prayer” sheet is folded and kept inside the cover of the journal. A special bound book with lined pages should be chosen for this prayer journal. We found some beautiful, inexpensive journals at Walmart, and they had Scripture verses on the cover. These made such lovely prayer journals that I bought one for myself (which is why I made two photocopies of “Preparing Your Heart for Prayer” – I wanted my own copy for my prayer journal”)! Students use their Bible to look up Scriptures each day; it truly becomes personal and special to them throughout high school! So, enjoy choosing whichever Bible you and your student would like best.
Getting Ready for English
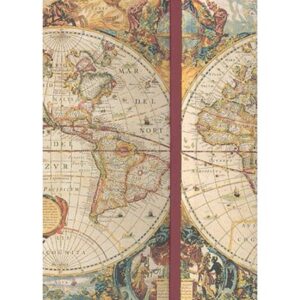
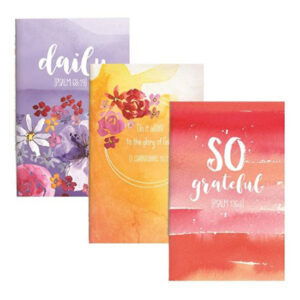
For English, I use either 3 bound and lined composition books (1 for English Grammar, 1 for Literature, and 1 for Composition), OR I use 1 large bound and lined composition book with 3 section dividers (1 for English Grammar, 1 for Literature, and 1 for Composition). If my student is still completing his dictation levels, I use 4 composition books, OR 1 large book with 4 section dividers. I also make sure to have index cards on hand for Essentials in Writing’s research paper. Finally, I have fun choosing a Common Place Book with my student. You can choose any keepsake-like bound, composition book with lines to copy memorable passages throughout the high school years. We found some beautiful cloth bound and hardback options at our local Christian bookstore, and my sons each had fun choosing one!

Getting Ready for Logic, Spanish, Integrated Physics and Chemistry, and Math
For Logic, I have my student photocopy the Chapter Tests, Unit Tests, and Final Exams as they come up in the plans. Getting Started with Spanish is a workbook, so all I do to get ready for Spanish is bookmark on our computer the link for the free pronunciation recordings. This just makes it easier for my student to find the site each time he needs to use it. For Integrated Physics and Chemistry, I use the ‘Course Materials’ notes in the WG guide’s introduction to gather the supplies not included in the IPC kit. Finally, I get ready for math using the notes in the WG Introduction and the notes in the math program I chose.
Thoughts on Record Keeping
For high school, I keep my student’s completed notebooks, binders, and workbooks. I put these all in order on a shelf each year, along with the checked off Heart of Dakota guide itself. Together these create a detailed record of the work that students need to do to earn credit. Using www.transcriptmaker.com, I create my student’s transcript. I also keep on file any required paperwork for my state, such as approved homeschool exemption forms and completed standardized test results. Each state can vary slightly in requirements for homeschooling, so be sure to check out your own state’s requirements at www.hslda.com.
Label Sticky Tabs to Mark Places in the WG Guide
Next, I label sticky tabs to mark places in my guide. I label the first tab “DAILY PLANS,” placing it on Unit 1, Day 1. If you are going to do things more as they come up in the plans, rather than how I’ve previously described setting up for WG, then you would also want to make sticky tabs for “DICTATION,” “BOOKMARKS,” and “SUMMARY,” placing them in the WG guide’s Appendix. One final thing I liked to do is make a photocopy of the Narration Tips, Written Narration Tips, and Written Narration Skills. Carrie does give permission to photocopy these. I keep these lists for me and for my student to reference throughout the year. However, you can just put another tab in WG’s Appendix for “NARRATION TIPS,” if you’d rather.
Shopping for Supplies
Carrie’s plans use readily available household supplies, and gives suggestions for many options. However, to get ready to begin WG, I just stock up on usual art supplies – like colored pencils, thick and thin markers, a few permanent markers and high-lighters, glue (sticks and liquid), scissors, construction paper, tissue paper (colored), tape (masking and clear), a ruler, a yardstick, sticky notes/tabs, paints/paintbrushes, cotton balls, yarn/string, etc. I also stock up on index cards and page protectors. Finally, a flashlight, paperclips, paper plates, food coloring, marker board with dry erase markers, and q-tips/toothpicks are also nice to have on hand.
Sorting Resources into “Things We Need Now” and “Things We Need Later” Bins or Totes
One of the last things I do is get two canvas bins. I use one for ‘things we need now’ and the other for ‘things we need later’. As I read through each box of my first week of WG’s plans, I put each needed resource in the bin for ‘things we need now’. I put the remaining items in the bin for ‘things we need later’. Throughout the year as we finish using resources, I put them in the back of the ‘things we need later’ bin, and I move the next books or resources we need into the ‘things we need now’ bin or tub. This way, my ‘things we need now’ bin only contains what we need for each week. Another benefit is the ‘things we need now’ are always mobile! Likewise, I put many art supplies in a tool turnabout, so these are mobile too!
In Christ,
Julie

